Friday, August 19, 2011

Bread Log 11: A small post for a large bread

Technical difficulties have delayed the breaducation video post for the time being, but the bread logs shall continue unabated.  My most recent bake was Hamelman's "Miche, Pointe-a-Calliere", and voila:
-

-
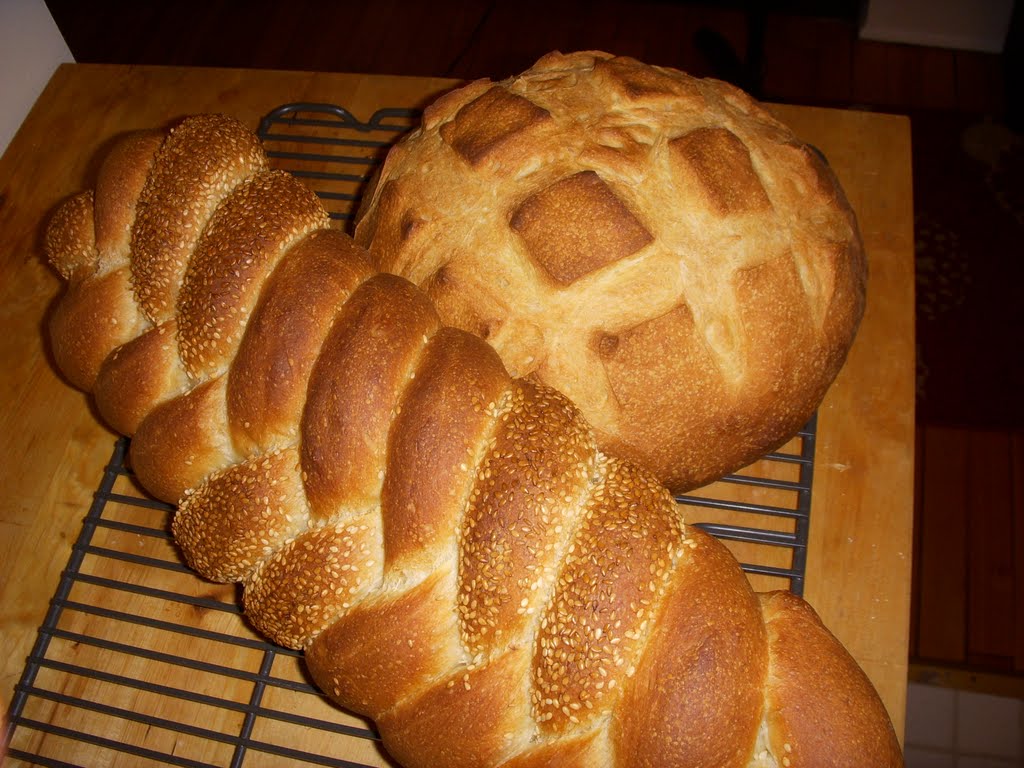
There it is in all its glory.  No before you think that I've lost my recently acquired knack for getting decent volume out of a loaf, this bread is actually supposed to have a low profile.  In fact, most of the elements of making this bread lend toward that goal.  First, it is a VERY wet dough, 80% hydration, where a standard dough is in the upper 60's. The second is an extremely high percentage of whole wheat flour.  Up until now the whole wheat loaves you have seen have hovered around equal parts bread flour and whole wheat.  This formula officially asks exclusively for high extraction wheat flour, a flour in which a small percentage of the bran has been removed.  This puts it closer in spectrum to whole wheat (0% bran removal) than bread flour (100% bran removal).  Because I couldn't get my hands on any high extraction flour I followed Hamelman's substitution suggestion using 90% whole wheat, and 10% bread flour.  The higher whole grain content makes mixing to develop gluten a slower process thanks to all those sharp edges puncturing the gluten network.  To counter this I gave the loaf an extra long autolyse, which gave the dough an extra boost of development without having to use the somewhat counterproductive mixer.

The third element contributing to the flatter loaf, and the most definitive is the shaping.  Rather than a tight first shaping followed by a tight second shaping, this loaf only received a rough first shaping followed by a light second shaping, similar to the rustic loaves from early posts. 

The final reason why this loaf is flatter is because:
-

-
It's HUGE.  Miche is a term for a large round loaf, emphasis on large.  For the production version of this formula the suggested scaling weight is 5 pounds, and it's not uncommon for a miche to weigh more than that.  The home formula is just shy of 4 pounds and it still nearly exceeded the width of my pizza stones. Another point of reference shot:
-

-
And here is a shot of the crumb.
-

-
I was curious to try the loaf as Hamelman insisted that the loaf be allowed to rest for 12 hours before eating, and stated that it's flavor would gradually change over the course of a few days.  While I know this is common enough for large naturally leavened loaves with a high percentage of whole grain, I have a hard time waiting an hour to cut into bread so this was arduous.  After letting it cool on a rack, I wrapped it in linen to rest the remainder of it's time.  My initial impression was that it was a dense, highly acidic bread with a strong undercurrent of wheat.  True to his prediction however this balance shifted over the course of the next 3 days, the sourness receding and the wheat flavor coming to dominate the impression.  I went from shrugging over the results to loving them, it makes me more excited than ever to get to the heavy rye breads some of which require a 24 hour rest.  Next week will be a light one again, as Whit and I are going to visit my new nephew, but I am in the process of baking as I type this, and will try to post the results while we are on the move.  Who knows, perhaps I'll even bake out there! 

-Vino

Here are the details from the bake:
Room Temp:  74.5
Water Temp: 51.8
Flour Temp:  75.6
Preferment Temp: 80.1
Final Temp: 75.7 (target 76)
Autolyse: 50 minutes
Mix: Standard incorporation + 2 minutes at speed 2, cut on bench, 2 minutes at speed 3
Bulk Fermentation: 2.5 hours with folds at 30, 1:15, and 2:00
Bench Proof: shape, 10 minute rest, shape, 2:15
Bake: ~45 min @ 460 degrees for 20 min then 420 for the rest
Steam: Spritzed bread, steamed on load and for 30 seconds after.


Saturday, August 13, 2011

Bread Log 10: Vermont Sourdough


Yes my friends, the time has come to embrace the natural . . . to shake off the yoke forced upon us by the tyranical commercial yeast barons. . .

You'll have to forgive me, this is why my wife doesn't allow me sugar after 9:00 pm. 

Bad jokes aside, it is a nice change of pace to be working on sourdough breads again, they are wonderfully flavorful and have a longer shelf-life than their commercially yeasted cousins. This is all thanks to the use of natural yeast in the form of a starter also known as levain.  As I was preparing for this post I realized that while I have explained many aspects of technique and materials I have failed to talk at ALL about one of baking's most important ingredients: yeast. Every formula you have thus far seen on the this blog has used commercial yeast as its only source of leavening, but there are a number of types of yeast available on the market:

Cake Yeast - comes in foil wrapped blocks, and before I got more experience as a baker I thought of this as the real-deal yeast that was probably used at all the professional bakeries.  Turns out not to be the case. Why not? It is highly perishable, and as a result can yield less consistent results.  You still may see older recipes which ask for it, but I'd google some conversions rather than worrying about getting your hands on it.

Active Dry Yeast - This is the only yeast I interacted with growing up, in its iconic little foil packets. It contains little oblong granules of live and dead yeast cells with some growth medium thrown in for good measure.  It is the least perishable form of yeast living for up to a year at room temperature, or over a decade frozen.  It does however need to be rehydrated (or "bloomed") before incorporating it in a recipe, and can suffer thermal shock if this isn't done at the right temperature.

Instant Yeast -  This is what I (and the bakery I worked at) use.  It is very similar to active dry yeast, but has smaller granules and a better percentage of live to dead cells.  It is more temperamental than active dry about storage, but when kept in the freezer like I keep mine . . . well lets just say I bought a pound of it when I left the bakery 2+ years ago, and haven't had to buy more.  It also has the considerable advantage of being able to be added directly to the dry ingredients without having to concern yourself with blooming it.

 Here it is in all its not very impressive glory.  I store the majority of it in a big mason jar in the deepest part of the freezer, and keep a small supply in a small mason jar at the front.  If you can't find instant at your supermarket, you can get it online, a single vacuum packed pound of the stuff will last you for a mighty long time.


So if I'm not using my beloved tyranical instant dry yeast what am I using? This:


If you guessed a blob at the bottom of a piece of tupperware, you get a gold star for the day!  This is my starter, and though it may not look like it, it may older than I am.  I received a bit of starter from one of my colleagues at the bakery which he had been using regularly for many years.

Keeping a starter alive is not a terribly complex process, though it does take consistency.  At the bakery the main levain we used (both white and rye varieties) were fed 3 times a day every day, and over time that yields an amazingly consistent culture.  When I am not using my starter regularly (as has been the case for the past few months of bread blogging) I refresh it a handful of times a week.

A refreshment involves moving a small amount of the developed levain to a new tub, adding fresh flour and water, mixing it together then letting it ripen for 6-8 hours. If you aren't planning on using it for a while it can be placed in the fridge after it has ripened.

In order to get my starter back up to speed for the coming formulae, I have been refreshing it 3 times a day 2 to 4 days a week for the past few weeks.  Most importantly I always refresh it at least 3 times consecutively before the final build for a recipe.

The final build is very similar to the preferments used in the earlier bread logs.  They vary from liquid builds (much akin to the poolish) to stiff builds (like the biga).  Unlike their predecessors however, they comprise the entirety of the yeast used in the formula.


 . . . enough with the back story. The formula for this week is a predominately white flour dough with a bit of whole rye added for flavor and extensibility. By in large, the process of working with a naturally leavened bread is like that of what you've seen in prior posts.  The only really changes are that of degree.  The extra enzymatic activity and acidity of the dough slows down the doughs development which requires extra autolyse and mix times and possibly additional folds during bulk fermentation.  Beyond that, the bulk fermentation and final fermentation tend to be a bit extended.

I chose to make 5 smaller loaves so that Whit could share them with her co-workers.  It also allowed me the opportunity to play with my shaping and slash patterns.
-
-
These are the 3 batards.  The outer two were a longer pointed shape the inner obviously more stubby. I did a single slash on the stubby one, a double slash on one of the tapered:
-
-
Then I decided to try something different with the last tapered batard and tried some cuts with scissors:
-

-
Yeah that didn't pan out so well, but it still tasted delicious! The cuts I made were at too steep an angle and their own weight resealed them before they could spring open in the oven.  This yielded an overly dense loaf.  It is easy to see the difference in volume in this side by side shot.
-

-
Lastly, I made a couple of boules and was sure to give them decently deep slashes:
-
-
My moderate scissor technique aside, the bread turned out quite well.  Baking it also reminded me how much I love the smell of sourdough bread fresh out of the oven.  That tangy acidity courtesy of the cultures lactobacilli is unmistakable even in the aroma.  In the next few days I'll be posting a video breaducation post of the mixing process I taped during this bake, so keep your eyes peeled.  One last thing before I go.  I need a name for my starter, so I'm going to open it up to my 5 or 6 readers out there to propose suggestions.  Just leave your ideas in the comments below!

-Vino

Here are the details from the bake:
Room Temp:  75.7
Water Temp: 65.7
Flour Temp:  78
Preferment Temp: 85.2
Final Temp: 80.5 (target 76)
Autolyse: 30 minutes
Mix: Standard incorporation + 2 minutes at speed 2, cut on bench, 2 minutes at speed 3
Bulk Fermentation: 2 hours with folds at 30, 60, and 90 mintues
Bench Proof: shape, 15 minute rest, shape, 2.5 hours for the batards, and around 3 hours for the boules with  0 minutes in the chiller
Bake: ~25 min @ 460 degrees
Steam: Spritzed bread, steamed on load and for 30 seconds after. and added skirts of tinfoil inside the oven to slow the venting.

Saturday, August 6, 2011

Bread Log 9: Semolina (Durum) Bread


Back in my days at the bakery one of my favorite breads was a semolina bread coated in sesame seeds. The formula I baked from for this entry is fairly different than what we used back then, but the resulting bread still made me nostalgic.

Semolina is a flour milled from Durum wheat.  It is a pale gold color, and is used throughout the Mediteranian and surrounding regions for everything from bread and couscous to pasta.
-
-
I put some semolina flour side by side with an all purpose flour so you can see the difference.  What you can't tell from the picture is that Semolina also has an unusual texture, more coarse but not jagged.  The less milled varieties feel a LOT like ball bearings when you roll it between your fingers.  This is probably why the flour is often used to dust the bottoms of proofed loaves to facilitate sliding them into the oven. The finished dough retains that lovely pale gold color, and has a light almost buttery flavor.  Sesame seeds are often paired with the bread and add a nice nutty flavor as well as a striking visual appeal.

The first Semolina formula in Hamelman's book uses an unusual preferment called a flying sponge.  I will let you conjure your own mental image for that.  It differs from other preferments featured thus far in that it contains the yeast for the entire mix (usually some is added during the mixing stage as well), includes a small measure of sugar, and only gets made an hour and a half before the mix as opposed to 12-16 hours prior.

Because the preferment represented 40% of the doughs flour I chose not to add my customary autolyse.  Despite a final temperature of 4 degrees warmer than I had aimed for, the mix went quite well.  When it came time for the bake I opted to try something new.  Half of the dough was shaped into a standard boule, and the other half I divided into 5 strips.

Here you can see I have already shaped 2 out of the 5 strips into longer baguette-like shapes.  While making the strips into boules before turning them into baguettes wold have yielded a more even mass, it would have also required three shapings to achieve the final shape. I didn't want to over handle the dough.


Here you can see the fist shaping in the middle, with the elongated second shaping below it.  The one at the top has been seeded.


Speaking of seeding, here was my seeding set up.  The shaped loaf is rolled on the wet paper towel in the left pan, then transferred to the sesame seeds on the right.  I did this with 2 out of the 5 strands.


This was the result!  I looked up how to do a 5 strand braid and voila!  Ideally I wanted the two sesame strands to be separated, but in my braiding naivete I alternated them at the onset.  A mistake my wife assures me I would have known not to make if I had gone through grade school as a girl.


Regardless, I was quite happy with the end results.  After the great volume I got in the beer bread, I tried to achieve a similar level of mix this week and I was rewarded for the effort!  Here are some shots of the finished boule slashed with the straight lame:
-
-
The volume is really good, and if you look close you can see a speckling of little bubbles on the side of the loaf.  That is a sign that I was getting good steam!  In addition to my fancy steamer I also chose to mist the bread lightly upon loading to see how that would effect the results.
-

-
Yeah, that's my high-tech misting apparatus.  I used it on the braided loaf as well.  The braided loaf didn't grow tremendously, but it was still nice and light relative to it's size so I was satisfied.
-


-

It was a fun bake and a delicious bread.  The next time I encounter Semolina it will use a sourdough starter, and I look forward to seeing the differences.  I was going to be baking my first sourdough bread on Monday, but it looks like it will have to wait a day, because I have a job interview!! Wish me luck, and thanks as always for reading.

-Vino

Here are the details from the bake:
Room Temp:  77.7
Water Temp: 51.3
Flour Temp:  75.9 (averaged between the two)
Preferment Temp: 81.2
Final Temp: 79.9 (target 76)
Autolyse: None
Mix: Standard incorporation + 3 minutes at speed 2, cut on bench, 3 minutes at speed 3
Bulk Fermentation: 1.5 hours with 1 fold at 30, and 1 at 60
Bench Proof: shape, 15 minute rest, shape, 1.25 hours for the boule, and around 1.75 hours for the braided loaf  no time in the chiller
Bake: 35min for the boule, 28 for the braid @ 460 degrees
Steam: Spritzed bread, steamed on load and for 30 seconds after.